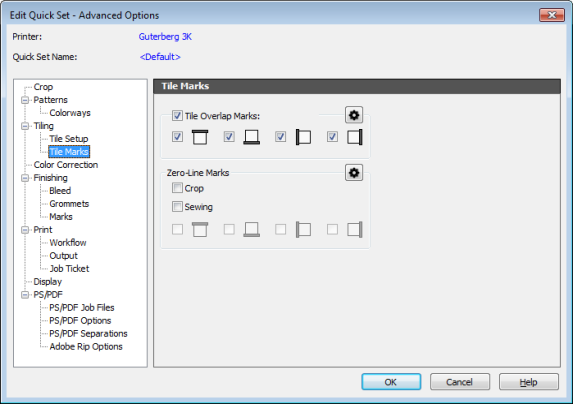
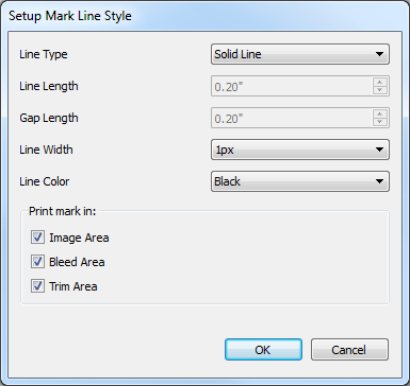
This option prints a black crosshair with a white inner portion in the middle of the tile overlap area. Check the [Crop] or [Sewing] that you want to use. For set mark line style, click button. This opens “Setup Mark Line Style” dialog (Figure 2).
Crop – This option defines an area of your image that will not be printed.
Sewing – This option allows you to add accurate marks to your job for folding or hemming after the job is printed. [Sewing] marks are commonly used with Tiling.
There are 3 types of Line Styles. These marks show the center point of each tile, allowing you to accurately place the tiles. Click button button to open the “Setup Mark Line Style” dialog. Here you can customize the marks’ attributes, such as [Line Type], [Line Length], [Gap Length], [Line Width], and [Line ].
- Solid Line - Sets the marks as a solid black or white line
- Dotted Line - Sets the marks as an alternating pattern of black or white dashes, and dashes with no color data.
- Alternative Line - Sets the marks as an alternating pattern of black and white dashes
- Image Area – This allows marks to be placed on the borders of the images
- Bleed Area – This allows marks to be placed on a bleed (located at Finishing > Bleed)
- Trim Area – This allows marks to be placed on a Trim (located at Finishing > Bleed)